

Seller's Description
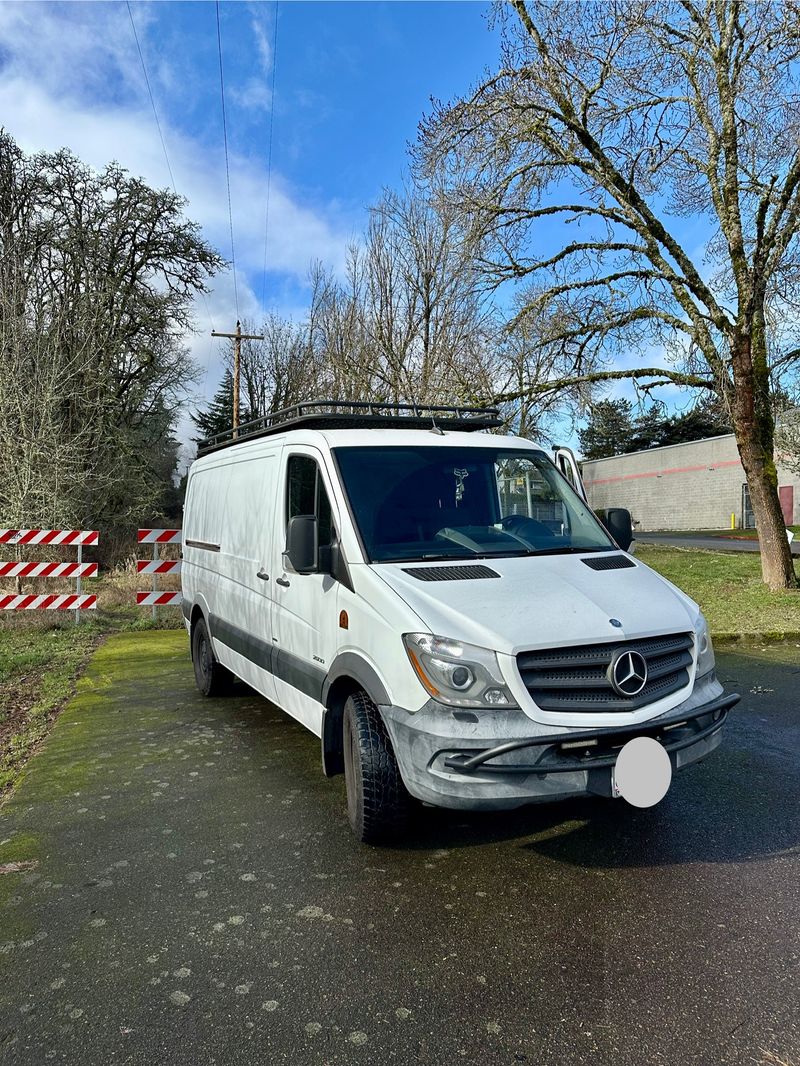
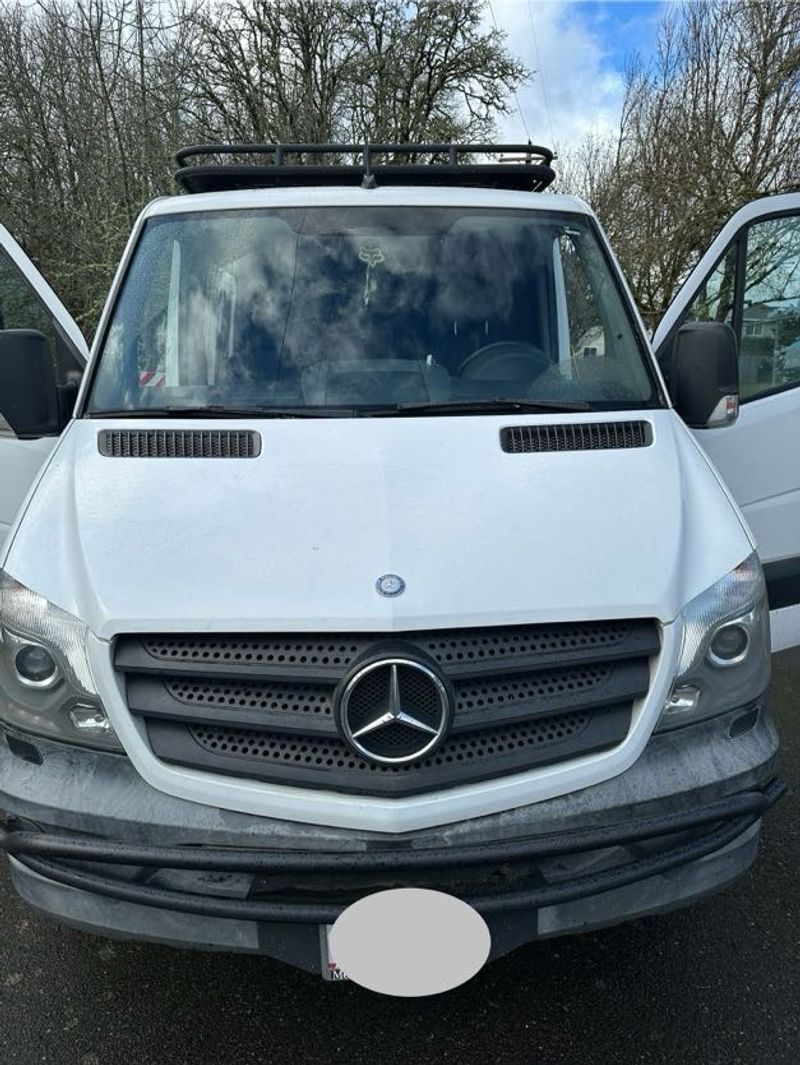
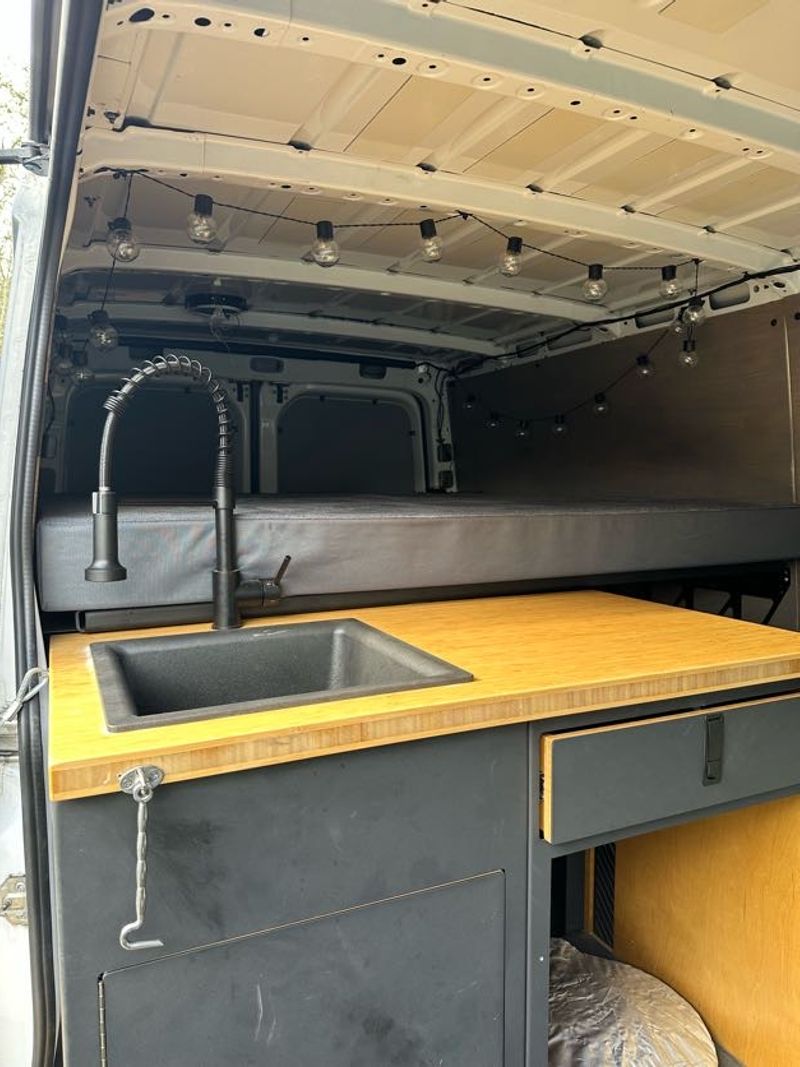
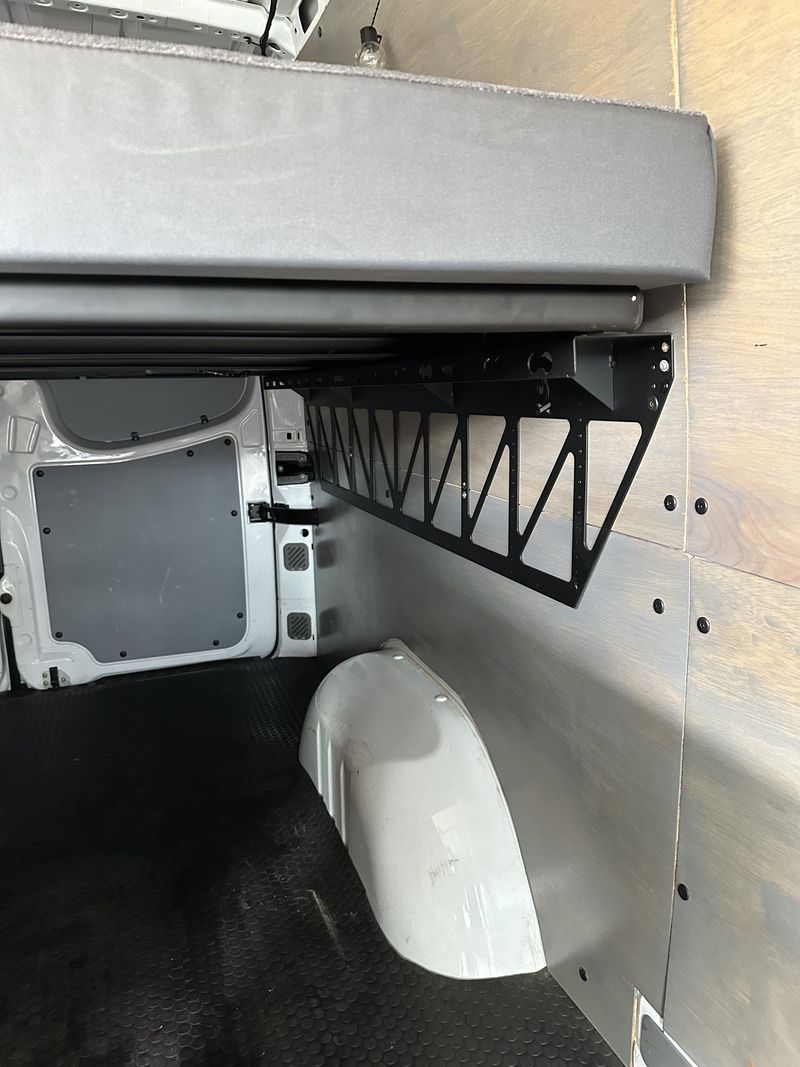
Update 3/26: all nox issues resolved by dealer under extended warranty. Taillight resolved as well. Back to 100% Update 3/19: downstream NOX sensor being replaced under warranty. Also resolving the tail light. UPDATE 3/18: Dropped off at a MB dealership to resolve CEL/Nox under warranty. Will update again once resolved. UPDATE 3/17: I have it scheduled to go into a local MB dealership tomorrow (3/18) in hopes of resolving the NOX/CEL. UPDATE 3/16: I drove it for one commute since coming home from service back in Jan. and the CEL is on. Preliminary research reveals a “ p229f$07e8” code which is related to the NOX sensor. I’m not exactly sure what I’ll be doing moving forward so even more willing to cut a deal. I’m lowering the price to reflect the future need of work around this NOX/P229F code. I've had this van since 2021~, purchased from the MB dealership in Stockton, CA. They replaced the rear differential before I took ownership. I've been diligent as far as maintenance goes always doing oil changes on time and actively repairing items as issues are presented - see list of work done with dates in the photos and I'm more than happy to answer any questions open and honestly. I have the official paperwork from all the work performed while I've had the van and I'm happy to share more details upon request. The tires are ironman all terrain tires, nothing special and will need replaced sooner than later - plan on getting an alignment at that time as well. The van is running the best it's been in years as I just got it back from the local MB Dealership service center. I'm looking to get something more off-road capable and moving on, albeit a bit reluctantly. There are a ton of external and internal parts almost all from Flatline Van Co; safari rack, wheel wrap side ladder, front nudge bar, bed + matching roam rest mattress, 41" galley, pull out tray with rocky mount fork mount. This was a constant work in progress as well as a mostly DIY van; it shows in places. Here's what I've done so far: 1. I took out the OEM wall panels and cut, sanded, stained panels to fit; there is one panel which is the top side behind the driver seat that is warping so it is slightly exposing the wall behind it. These panels are held up by a riv nut + furniture bolt combo. I use these in a variety of places as it creates an incredibly strong connection. The riv nut is installed into the thick metal of the van (sealed correctly) and the furniture bolt connects to the threads of the riv nut. This means the panels are entirely removable and the riv nuts could be re-used if someone wanted to re-do the wall panels. A. I had to custom cut the rear door hinges into the wall panels - it's rough work but it's all sealed and the rear hinges function as intended - can still fully fold the door out and fold the hinge back. 2. Installed Havelock Wool against the metal walls of the van with the panels installed over. This wool is a very popular choice and creates an incredible thermal barrier. 3. Cut black coin grip floor to match the factory OEM floor. There are two seat rails that are located behind the driver seat that I just laid the coin grip over - someone determined could easily cut them out and install a bench seat. 4. Installed Flatline Van Co "DIY" bed using riv nuts + furniture bolts. I've slept in this bed over 100+ nights with my spouse and no issues at all. The combination of riv nuts + large furniture bolts create an extremely strong connection/support system. The riv nuts are installed into the framing of the van and the bolts pass through the wall panels into the threaded riv nut. A. Matching roam rest mattress is EXTREMELY comfortable. I've heard lots of people say they prefer this mattress over their home bed. B. I installed "gun safe lights" that are motion sensor activated under the bed. This unit plugs in to the lights and unplugs for easy charging using any USBC - this has been one of my favorite additions that was so simple. 5. Installed pull out tray in rear "garage" area of the van. The tray's sliding action is rough but it works just fine - locks out at full extension as intended. The bed is intentionally mounted high enough that a 29" mountain bike can fit into the pull out tray fork mount without having to remove the seat (front wheel has to come off obviously for the fork mount). There is a standard rocky mounts fork mount bolted into a piece of 2"x4" - this could easily be reconfigured to fit your bike. I have a second, matching, unused rocky mount fork mount I'm happy to include. 6. 41" galley installed into the framing of the van using the same riv nut + furniture bolt combo so it can easily be removed. This galley came from a friend so it had a sink already installed plumbed to a "clean and dirty" water tank combo under the sink. Currently there are large water jugs under there - included with the sale. Everything was wired and working at some point but I never connected it in my van so I can't confidently say the pump/sink setup will work once connected. I just never had the need for a full sink setup so I really only ever used the sink for storage. A. I DIY'd a fold out table (see in photos) using a variety of materials - the table itself is a piece of laminated wood cut to fit - everything works fine and I find it to be really nice to have a table in that space, but can easily be removed. 7. Flatline Van Co Safari Rack - this was installed early on and I've had no issues. This is the V1 style and is all one unit of fabricated, powder coated aluminum - it's a beast and removing it would require a forklift or shop with a lift and a couple of people to help. A. The roof has 2 smaller circular fans installed - the wires are there and ready to be wired up. I installed these using marine grade sealant and lots of it - never had a single issue with these and I do notice an airflow when they are opened. They sit below the floor of the rack and open slightly as it stands - to get full functionality you'd need to cut holes into the rack (made from aluminum so not terribly involved). MISC: The TPMS light is on but the tires are fine. I just replaced the battery. There are a set of nice winter chains included. The aftermarket Kenwood head unit with backup cam working with no issues. I have never had an electrical or water system. I do still owe $4.8K on the loan but that's coming to an end very shortly so easily manageable in this transaction whether it's using the VanCamper pay system or navigating in a private manner.
About
- Make: Mercedes
- Model: Sprinter 2500
- Year: 2015
- Fuel: Diesel
- Odometer: 167,900 miles
- Sleeps: 2
- Seats: 2
- Type: Camper Van
- Roof: Standard
Payment
Amenities
- ac_unitAir conditioner
- health_and_safetyAirbags
- Solar panels
- electrical_servicesPower inverter
- Heater
- Ceiling fan
- Backup camera
- Shower
- Extra storage
- Toilet
- AWD
- 4WD
- electric_rickshawGenerator
- Tow hitch
- tvTV
- Water tank
- Leveling jacks
- pedal_bikeBike rack
- accessible_forwardWheelchair accessible
Kitchen
- kitchenFridge
- Stove
- Sink
- diningTable
- microwaveMicrowave
- Oven
About the Seller

Russell
Partner Services

Ready to drive this rig home? Try smarter RV insurance which covers the vehicle, build and personal rentals.

Need a loan for this campervan? We've teamed up with Lightstream to bring good-to-excellent credit customers fast and easy financing.
Disclaimers: Partner services for this listing are provided by Vancamper and not the seller. When you shop with our partners, we may earn a commission (at no cost to you). To learn more, click here.